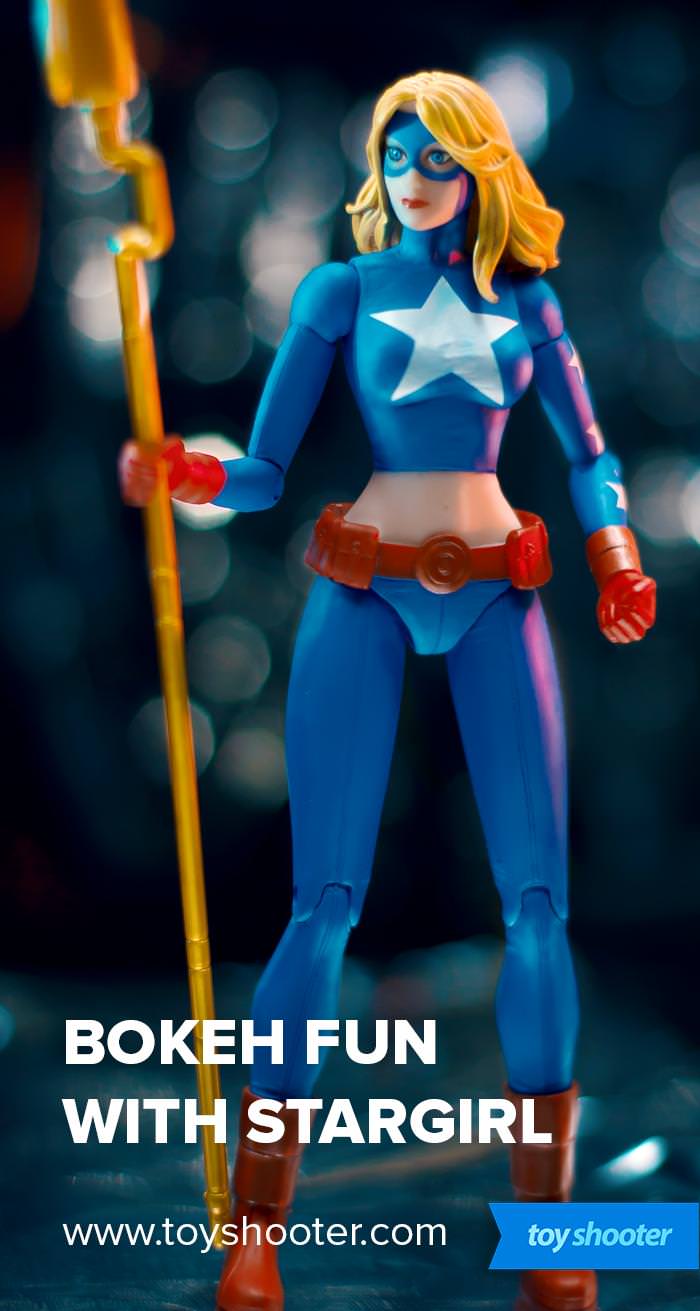
One of the great personal moments as a photographer is realising you've improved at the end of a shoot.
For me, this shot is one of those moments:
The pretty background lights aren't the key aspect of what I believe has improved in this shot (though they help). What I'm most pleased about is the lighting on the figure, which is the result of a lot of trial and error, knowing what's not worked from previous shoots and knowing what's going to make a difference as I'm lighting the subject.
Shooting Stars
I've been shooting DC's 7" line of figures and I've been trying to come up with a "look" for each shot.
For Star Girl, the theme I came up with was somewhat inevitably, stars.
I thought about doing some monitor backlighting with a nice star field, but I figured this would be a great opportunity to create some bokeh backlights in the shot.
Bokeh is a beautiful effect produced by lenses -any point of light that is out of focus will produce blooms of light. You need a fast lens that you can shoot at a wide aperture to pull this off - F2 or lower for the most part. You can produce it at higher apertures but that requires playing with the distance your lights are from the lens, and thus how powerful they are. Suffice to say, producing the effect is trial and error whatever lens / aperture you're using.
Shot deconstruction
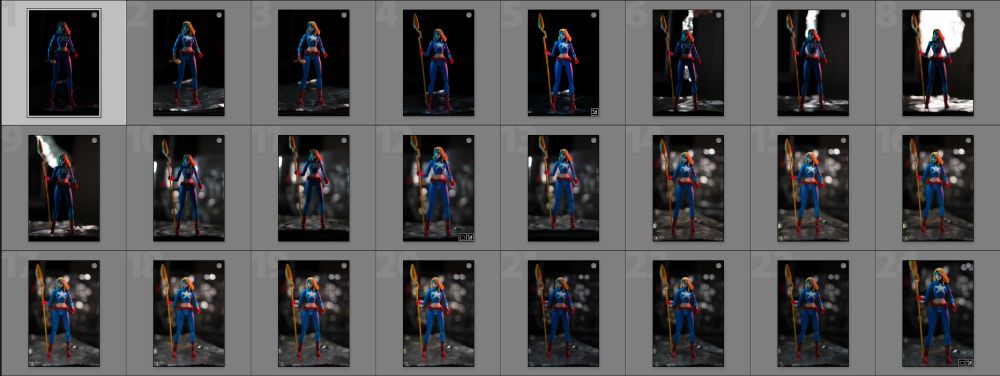
Here's a behind the scenes shot of the setup for this picture.

For this shot, I built the lights up on the Star Girl figure first in the order you see above.
1 & 2. Colored Key lights
The closest key lights are two telescopic Ikea lamps with opposing red and blur gels. The bluer light is closer because blue light is a weaker wavelength than red, these are fairly hard light sources but diffuse a little through the gels.
3. Soft box
I've also got a big softbox out of shot on the left (not the desk lamp which is turned off) dumping some white light over the whole scene. You can just see the same softbox on the left, but that's also turned off.
4. Foil
I've put some foil under the figure to bounce all the light sources back up and illuminate her from below. This creates more light around the lower edges of the figure and increases exposure.
5. Top white key light
Sat on the right of the desk is my F&V R300 LED ring light which is super powerful. I used this on a pretty low intensity and held it with my hand directly above the figure's head - literally just out of shot. This counters the red and blue lights and creates more natural color definitions and shadows from above.
With these lights in place, I framed the shot and dialed in the intensity of each light to get the look I wanted.
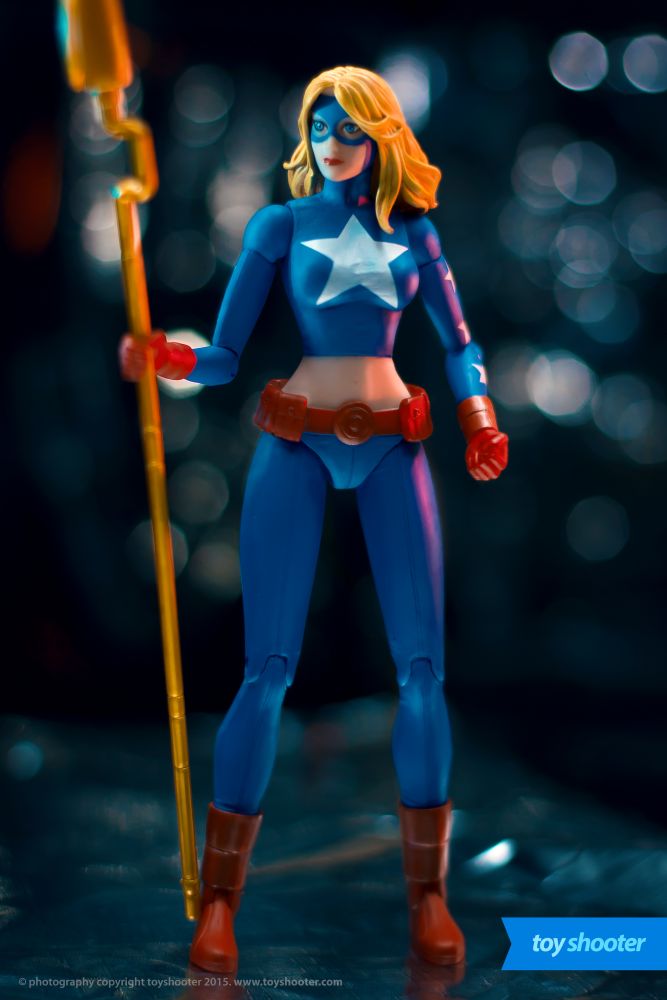
Here's a shot without the background bokeh lights.
6. Bokeh light
Sat on camera left of the figure is a very powerful LED light firing straight behind her at ... plastic packaging! I literally took the plastic insert the figure came in along with another similar one and used these to create the bokeh field. Just by looking at the BTS shot above, you can see where the plastic picks up the light and reflects it at specific spots. Combine this with a wide lens and you get the bokeh effect visible in the final picture.
The monitor serves no purpose - I literally just pushed it out the way to frame the shot, this would have bounced some light around as well. You can see a little red bloom on the left of the final photo which is a reflection of the red telescopic light in the monitor. Not planned, just the way it turned out.
This is how I work - building lights up, taking test shots, tweaking things, adding / removing things along the way. You can see the how this shoot progressed from start to finish here:
Post
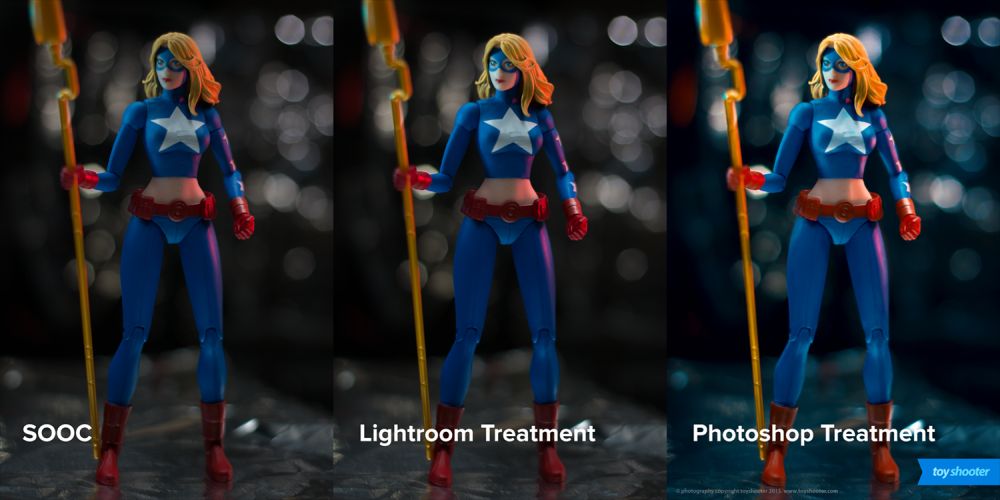
I used my usual post production process on this - some tweaking in Lightroom then straight into Photoshop for color corrections and dodge / burn. I'd just bought a Wacom Intuos2 graphic tablet the day I took this shot which was actually the primary motivation for doing the shoot, so I would have some new material to try it out with!
Dodging and burning with a Wacom tablet is like going from a manual to an automatic car. I was definitely in "learner" mode with the pen controls at that point, but the ease (and speed) of treating the whole photo was insane.
If you haven't got one of these things already, I can't recommend them highly enough.
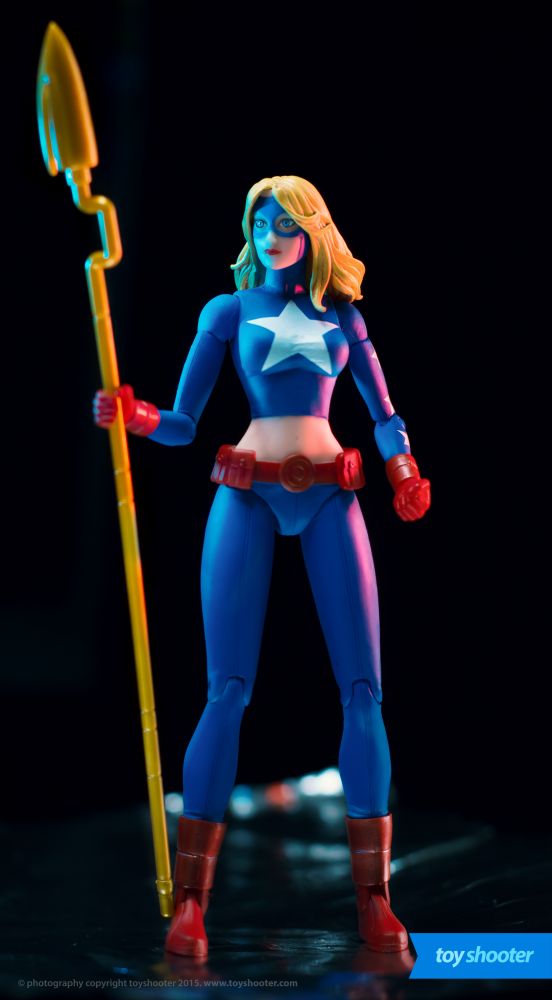
Here's the final shot straight out of camera, after Lightroom work and the final Photoshopped image.
Things to improve ...
Being ultra critical, here's a few things I'd improve next time:
- It's actual a hair out focus (fail)
- The light reflected on her crotch from the foil looks a little unnatural
- Some rim lighting round the left of her waist would help as this blends into the background, altenatively getting some of that Bokeh blooming behind that area would solve the problem
- The red and blue edge lighting almost looks fake, as if it were done in Photoshop, when it's actually not (bar the dodging). Some graduation on the lighting would help with this to create a nicer light fall off
Want to take pictures like this?
If you like this shot, make sure you join my newsletter below to receive my Toy Photography gear guide and emails when I publish new tutorials ...