Sometimes I get a great idea for a shoot in my head, get all excited preparing it and then the results fall flat.
This article is about pushing through challenges and adapting to problems when you're doing a shoot.
Flower power
The day before my Poison Ivy figure was due to arrive in the post, I had a brain wave for how to shoot her. I'd head into the garden and grab some leaves, flowers, twigs and weeds and create a floral "bed" for her to lie in, shooting straight downwards to capture this setup.
Then I started to think about lighting, and figured I could make use of some creative monitor back-lighting to create an eerie green background to illuminate the flowers and figure.
To set this up, I used my laptop as the back light and literally arranged the flowers and figure straight on the screen. I propped the keyboard part up so I could still type on it and be able to lie the monitor flat on the floor. I put a tripod straight over the screen, mounted the camera (50mm lens) and tweaked the height until the framing of the figure and screen were perfect when shown through the camera monitor.
With the camera, laptop and figure in position, I then laid out the flowers and leaves, checking their position in the camera monitor so I knew how they would look in the final shot.
That completed the scene setup.
Articulation
One of the key components for pulling this shoot off successfully was the post of the figure. I wanted the photo to sell the idea that she's lying in this flower bed, as if it's the most comfortable place for her to be.
Since I already own a few figures in the DC 7" line, I was aware articulation isn't great - a trade off with making the figures almost statue-like but the range of motion on hip points / feet etcetera is limited on some of these figures.
Luckily, out of the packaging I found the figure did exactly what I needed it too. Pointing the feet downward was critical - imagine how this shot would look if her toes were just pointing straight at the camera.
Cocking her left leg out was also key to suggest a relaxed, supine position which just about worked given the swivel articulation in her upper leg.
One arm is outstretched (it wouldn't bend up any further), the other held behind her head. I did all this posing on a desk before moving her to the floor on my laptop screen.
Problems ...
At this point I was ready to see the effects of the back lighting. I'd already made a green background in Photoshop, and in fact the entire scene (flowers, figure and camera framing) is directly on top of my Photoshop canvas on the monitor. In theory, this would enable me to paint UNDER the scene with different colors and tweak it if I wanted to.
However, it bombed - I could tell from a few shots this wasn't going to work - the effect just looked odd:
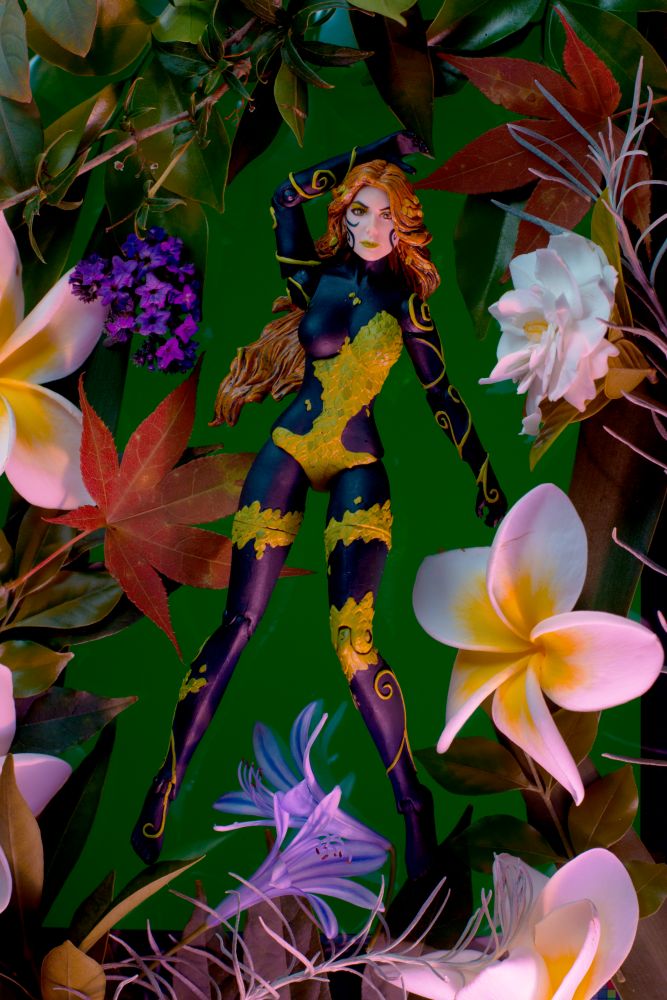
Then the question became how do I recover this shot? The flower arrangement and figure looked great so there was no way I was abandoning this shoot.
Turning the laptop off, I played around with a few lighting setups to see how I could like this scene, which is challenging because everything is laying flat on the floor - I can't back light any more and the flowers and twigs now throw shadows.
I could have settled for a shot like this, which is ok but then I had another idea (below)
Recovery
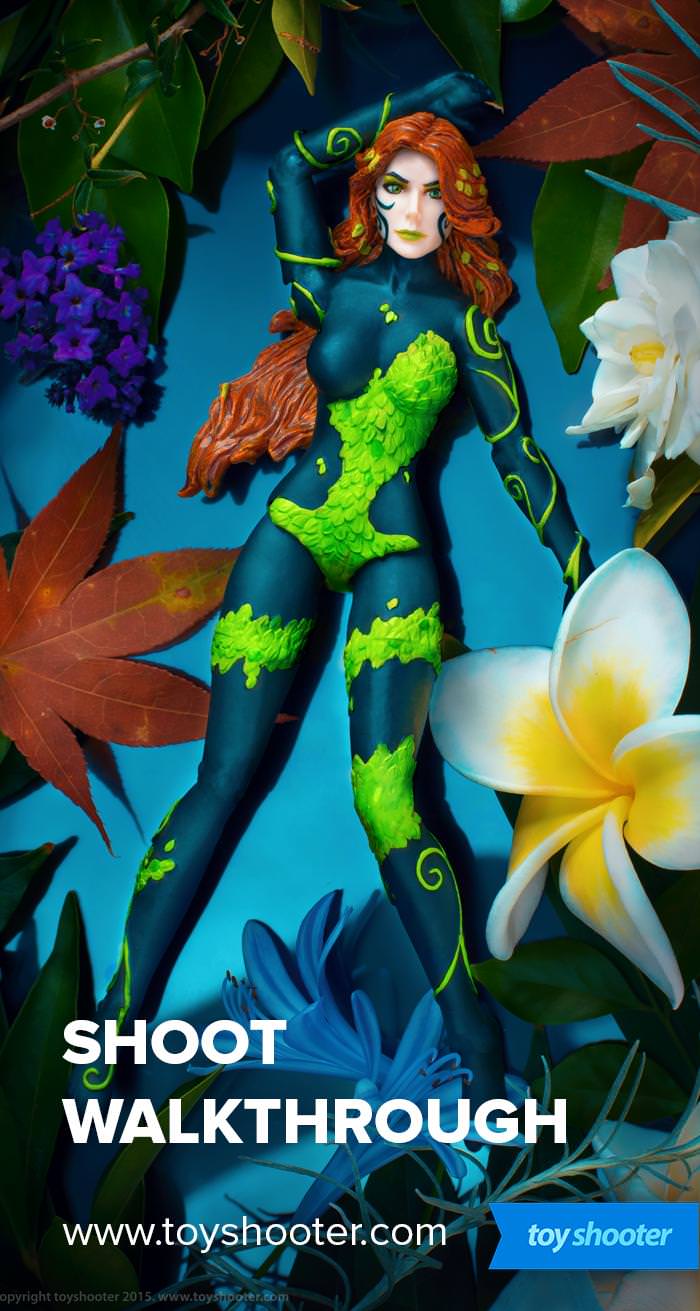
Since the reflective screen of my laptop is still visible, I suddenly realized I could bring back the "back light" by reflecting light in it - so I dragged one of my big soft boxes over the top of the whole scene (and camera) to illuminate the whole scene from above.
This does wonders - it separates the figure from the background, creates more depth and illuminates the whole scene with soft, white light.
It's amazing how many times I find how just one change in a setup can completely change the picture, as you can see comparing the reflective and non-reflective versions.
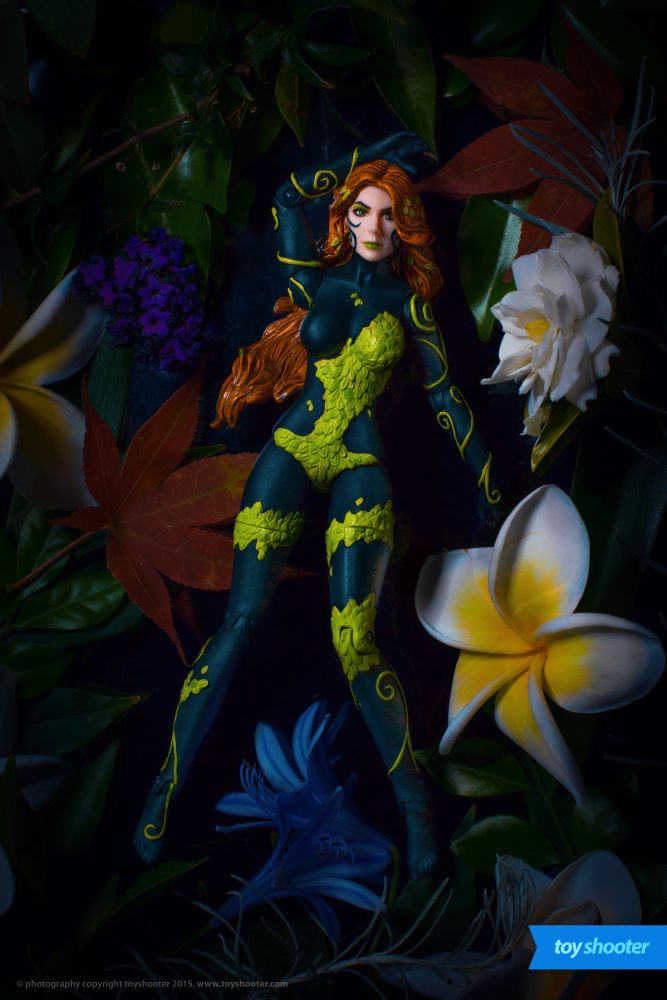
If you look at the reflective part of the final shot, you can see a dark band running under her legs - that's actually my arm blocking the overhead light so I could reach the camera shutter. I was aware of this during the shoot and thought it created a bit of dimension to the reflection so I didn't change position.
Post
I did a lot of work on this in post. Some basic adjustments in Lightroom and a heavier vignette than normal, and then into Photoshop for a couple of hours to tweak things.
The flowers and reflection are great but they steal the spotlight from the figure, so much of the work done in Photoshop was to reduce or darken those elements and bring up Poison Ivy so your focus is on her - it's a busy shot so even though she's framed nicely by the arrangement her green color makes her blend in too much with the surroundings.
I brought up the color of her body to compensate for this, and burned many of the leaves and flowers (especially the white ones) to reduce their importance in the shot. I also added more vignetting around the edges and darkened other areas. This starts to create a murky, mysterious quality to the leaves where only highlights appear around the center, leaving pool of light in the center that focuses on the character.
One problem with this figure is the dark paint job applied to her hair - it looks a little unnatural to me so I masked the darker paint and lightened it a little to make it blend better with her primary hair color.
Summary
I'm really happy with how this turned out. The New 52 Poison Ivy figure isn't arguably as interesting as the "classic" Poison Ivy design, but this setup really helps show off what a great figure this is.