I'm never short on ideas for toy shoots.
My big secret is that most of my inspiration comes from the pages of comics and art that I see around the web. I collect a lot of ideas for shoots on Pinterest - you can see the boards I've created if you follow me there.
For this shoot, I got inspired by this artwork -

An incredible piece, I love the idea of all these villains holding back Bats from the one he's really after.
As you look at this and think about how to shoot it, a big problem comes to mind -
How do you get Batman's face and The Joker's in frame at the same time?
The answer, comes down to lens choice ...
The Shoot
I decided to pull together as many DC New 52 Batman villains as I could for this shoot, and it was a bitch to setup.
Most of the time consuming work was posing and articulation - I had to get all these characters very tight together, but at the same time bend their upper bodies away from the center to allow the camera to capture as much of them as possible.
Batman's cape takes up a lot of floor space, and every time I knocked one character it would often throw a few of the others out.
The Joker's thin, wiry body was ideal for bending backwards, allowing me to open up the distance between his face and Bats. Because he's bent backwards so much, I had to prop him up from the rear to stop him falling over.
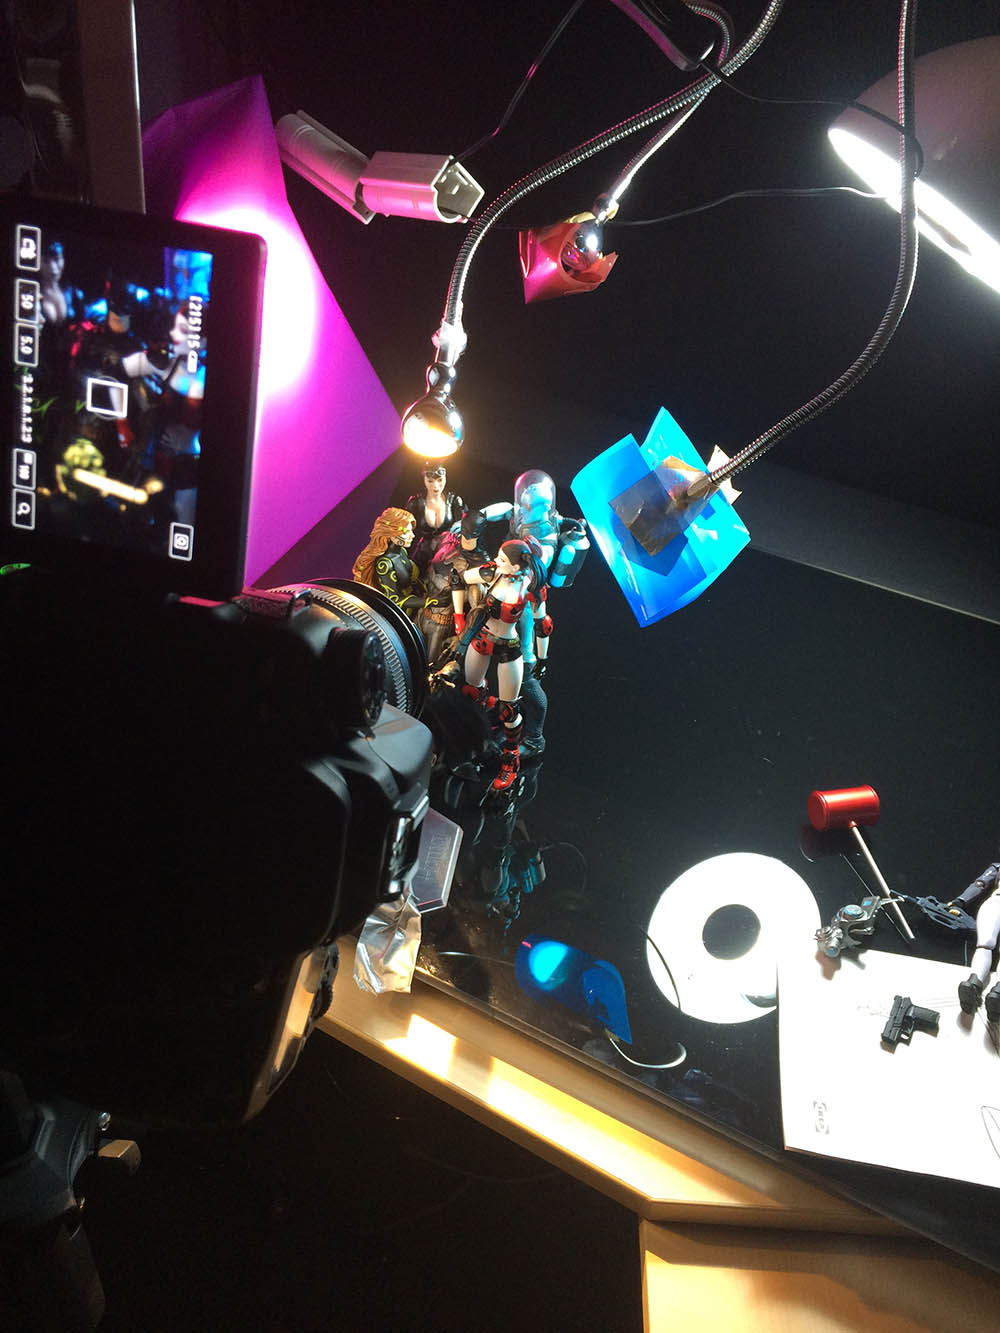
With characters in place, I moved lights around the scene, and finally positioned the camera above the scene on a tripod.
I shot this scene with two lenses - a Canon 35-180mm wide angle lens and a Canon 15mm Fisheye.
The wide angle does a pretty good job at opening up the scene, and being a zoom lens allowed me to crop into the wider field of view in-camera.
Next I tried the fish eye. As you can see, the difference is dramatic:
The fisheye has a much shorter minimum focal length (how close I can get it to the figures) but due to the nature of the lens it sucks much, much more of the scene in.
The first time I tried this, I had to completely re-arrange the scene as the fish eye ended up exposing all sorts of out-of-frame stuff like my lights, shooting table and backdrop edges.
This lens does a great job helping to sell the idea of the shot, bringing Bats and Mr. J's faces both in frame.
Fisheye lens can be a bit of a gimmick, but in this scenario they work well.
I tried a couple of different sessions to arrange and light this scene, but I just wasn't happy with the results.
Then a new arrival changed the game completely - Harley Quinn!
Adding an extra figure in meant a complete re-arrangement of the scene, made even more difficult as I was trying to keep everyone in shot.
This LOOKS like it's easy when you're viewing the photo but moving these small figures and trying to move the camera so they fill up the frame is really challenging.
In the end, after many different test shots I decided to ditch the fish eye and go with a wide angle shot.
That also meant dropping the idea of having Joker's face in frame with the rest of the characters.
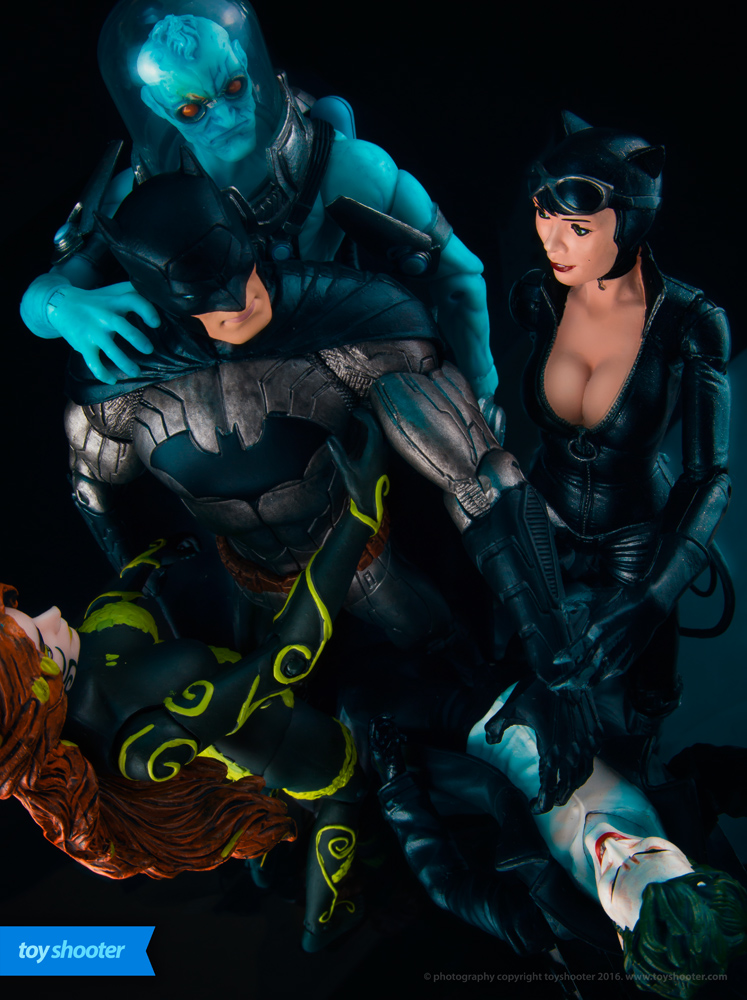
Because I still wanted Joker to be a crucial element of this shot, he's the only character who's lit separately from the rest, creating a literal and physical separation to tell this little story.
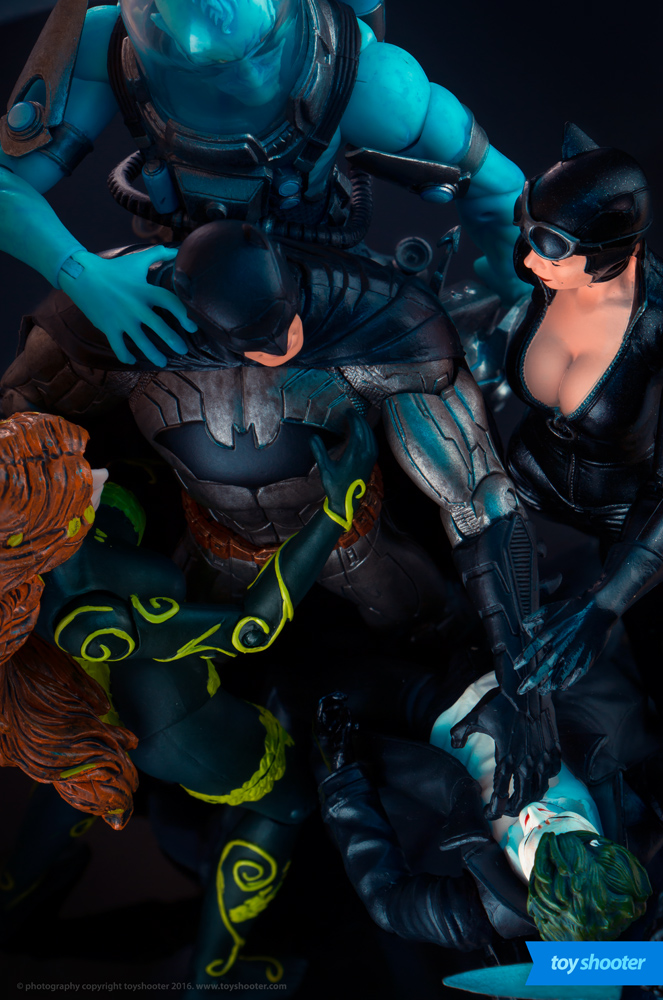
Could I have got a better shot? Maybe. After several attempts over a few hours, I decided to settle on this final composition and lighting:
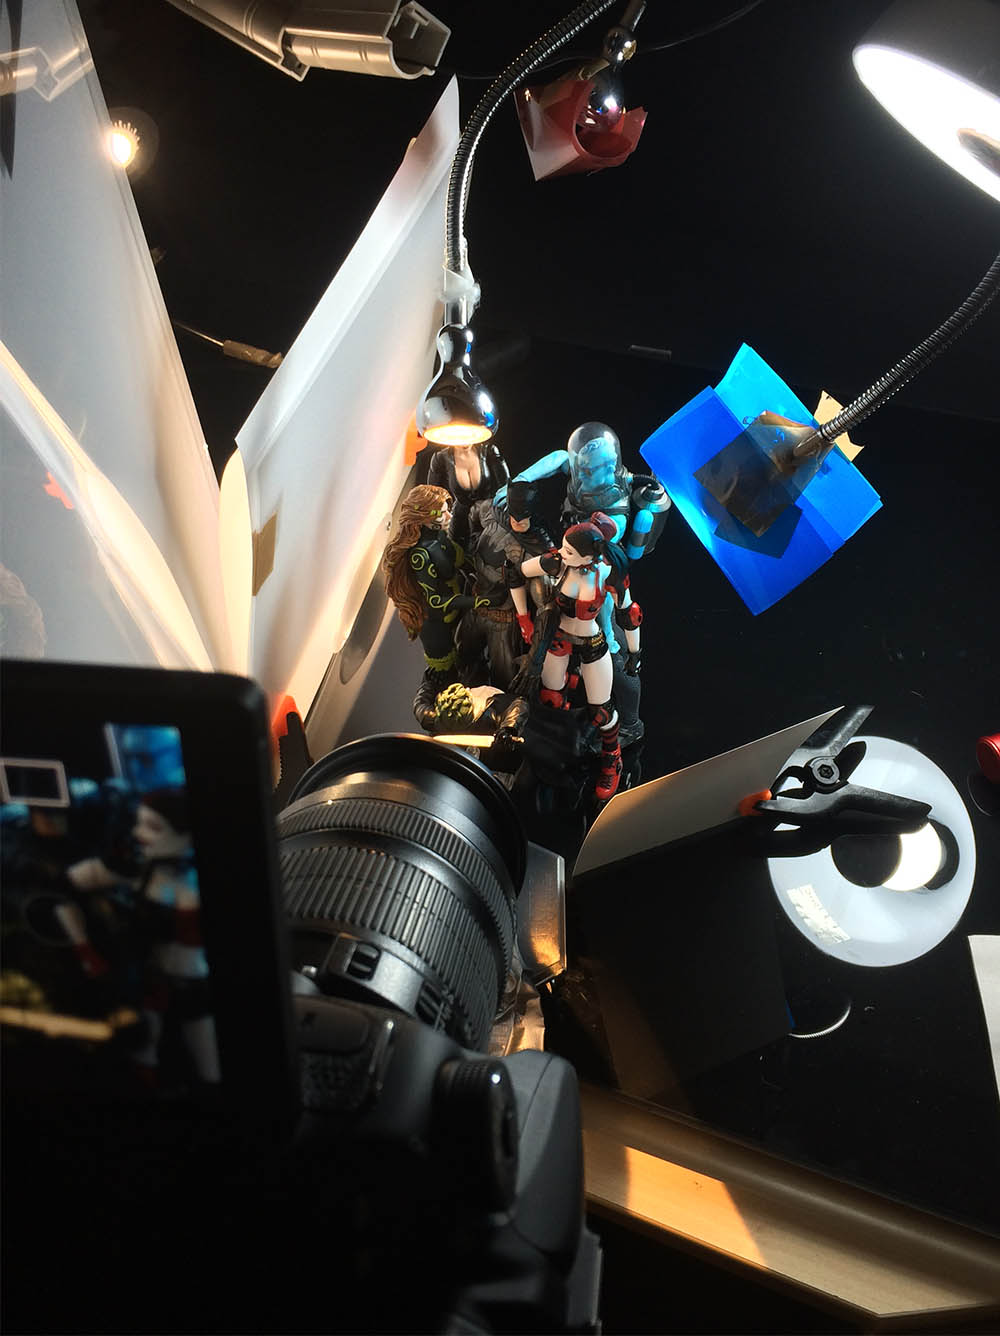
The key to this setup is the key light is effectively behind the scene, and I'm using a lot of carefully placed reflectors to spill fill light onto the front of the figures.
That lighting on the joker is simply one of my telescopic lights with some foil around it to prevent it spilling onto the other characters. That said, I pushed the foil VERY carefully so it just hits the side of Harley Quinn's face/nose and adds a bit of drama to her face.
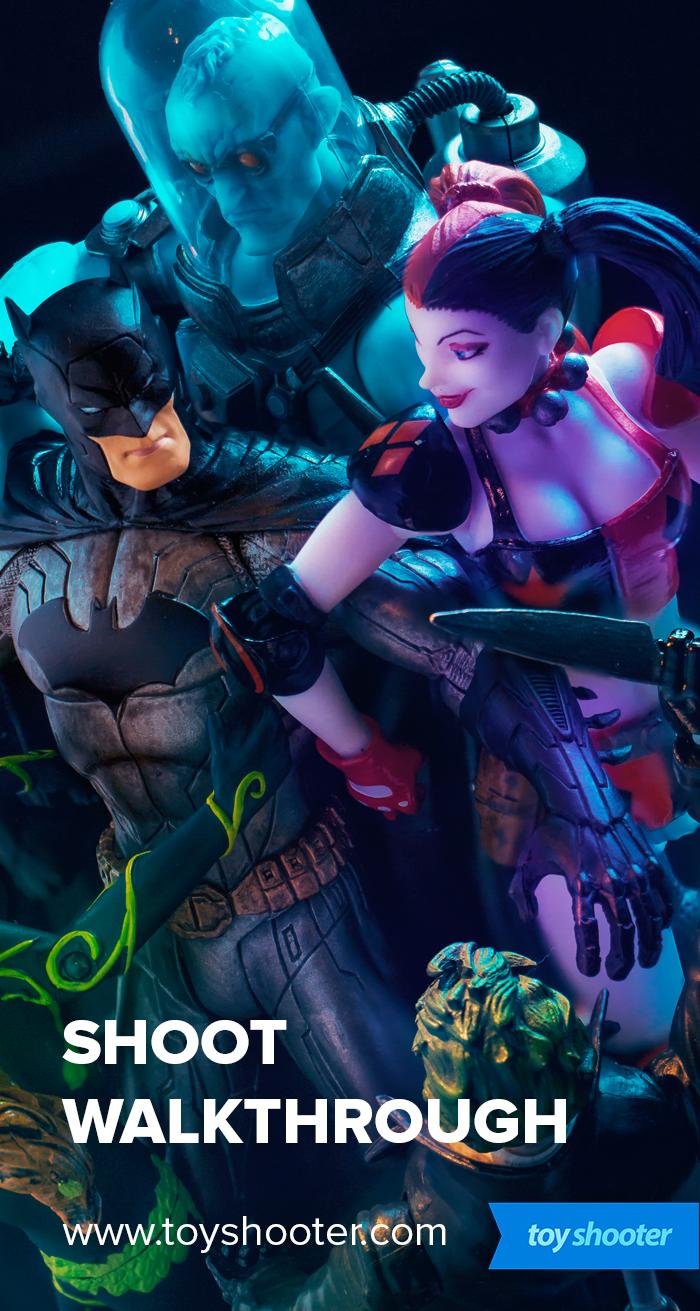
One slight push on that light and it completely trashes the shot, which you can see in my behind the scenes video for this shoot:
As I'm doing for a lot of my shoots, Once lighting composition and framing are locked in I take a series of shots to focus stack the final picture.
At last I can put these figures back on the shelf!
Post
I did more than usual to this in post. My standard Lightroom treatment was applied, then into Photoshop for a lot of work.
I started off with some color grading to get a "look" for the scene, then applied my standard Photoshop treatment to the shot (Dodge and Burn, Custom Vignette).
Where it got interesting was in some re-coloring.
Each of these figures tells a story with their color, and if you look carefully you can see the color tone of each "spills" onto Batman who is being affected by all of them.
Catwoman didn't get any treatment other than my overall color grade, which shifted her darker catsuit into some Blue/Teal tones.
Mr. Freeze is a great figure, tonnes of interesting blue tones which also didn't need anything specific done to them.
I isolated the Joker's hair to make the green more vivid which was affected by the warmer spotlight used on him.
Where it gets interesting, is how Poison Ivy and Harley Quinn have been colored.
I really wanted to get this look on Harley Quinn:
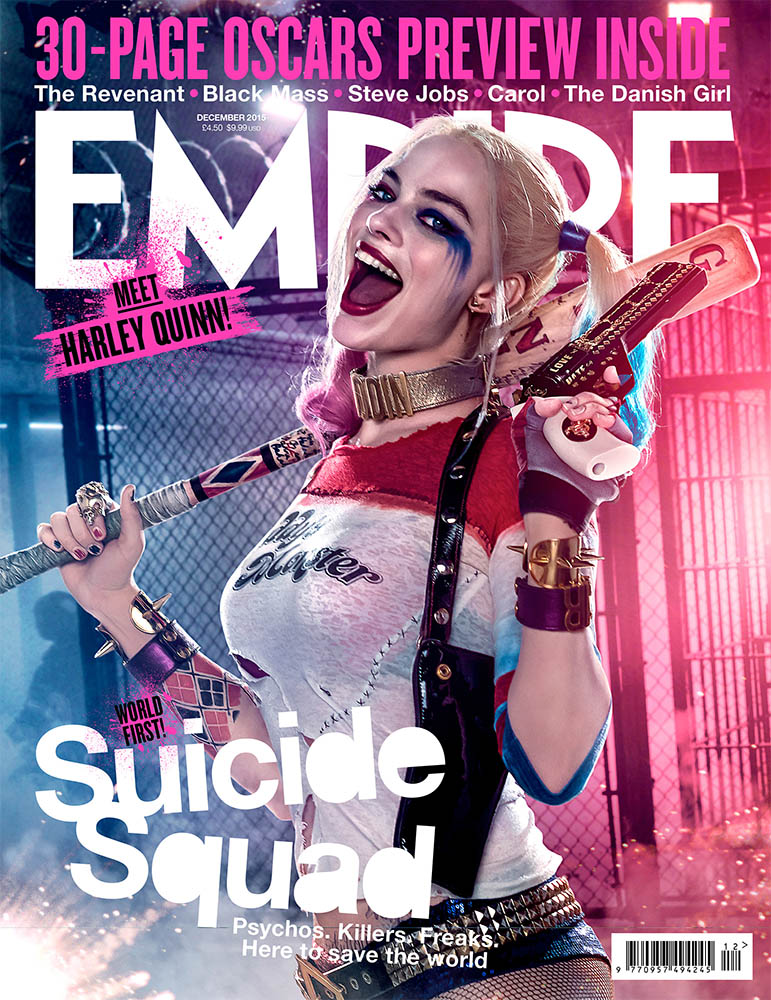
... and I'd toyed with a purple gel during the shoot but it was wrecking the light on the shot.
Enter Gradient Map adjustment layers.
I created a gradient map from dark to light purple, and masked this in just over the right side of the photo covering Harley. The opacity is lowered and it's set to a "Color" blend mode so only the color tones are shifted (not luminance / saturation).
I love this look!
For Poison Ivy, I used the same purple gradient map but set the blend mode to Divide, which effectively inverts the effect and creates a green gradient map, which in turn accentuates Ivy's green figure. Where the Harley gradient is applied in a strip on the right of the photo, the green gradient is a strip on the bottom.
The clever part?
The blend modes of the Purple and the Green layers effectively "cancel each other out" where they intersect so you get a seamless transition between the two areas. If you look carefully at Bat's legs / waste you can just see how these layers are blending / crossing over.
Still, I mask out areas of these gradients where they don't make sense - I did't want the purple spilling onto Joker and I've toned down these effects in a couple of spots.
The overall effect is that each character has it's own color pallette and character whilst - just - remaining believable as a photoshop. Quinn's purple rinse is the only "fabricated" part of the shot lighting wise.
The final shot:

It's a wrap
When a shot isn't fun anymore, it's time to cut your loses and move on.
I'm not 100% happy with the composition for this shot, but the retouching treatment has created a result I'm pretty happy with.
To learn much, much more about toy photography, join our newsletter using the form below: